Windows is an amazing software compendium which involves countless algorithms working in harmony with each other simultaneously to ensure the user can derive the intended benefit from the computer.
With this much facilitation and ease, problems are also bound to creep in. One such problem is of junk files that cause severe loss of speed. The same goes true for WinSxS folder. It should be cleaned up to achieve high speed with less or no errors. Using tools such as ST Cleaner are of help in this regard. You can try our ST Cleaner from the following link to clean up the WinSxS folder.
ST Cleaner Download w/ Verisign Digital Certificate
The size of the OS expands with each update that is installed. And then users install apps and softwares from here and there. And then here is the biggest culprit. Piles and piles of junk files and folders are created every single day when users browse the internet. These junk files continue to sit on the hard drive unless they’re removed by the user. However, today we’ll focus on this system folder known as WinSxS. This folder was introduced back in the day when Windows ME was rolled out. What WinSxS basically does is it stores files of Windows features as well as any files related to windows updates. There is no point of keeping such files in the system once they’re no longer required. And this is exactly what this article will explain step-by-step.
Solutions
Solution 1: Clean the WinSxS with Disk Cleanup Utility
Disk Cleanup utility is an inbuilt tool which comes as a component of Windows 10. It helps to remove the junk files, temporary files and a lot of unnecessary stuff to free up loads of space to the user.
- Click on the start button.

- Type the following text in the start menu to search for disk cleanup utility: cleanmgr.exe
- Open Disk Cleanup from the search results.

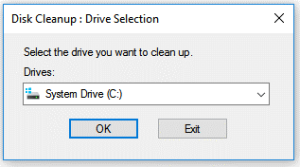
- Select the system partition, so that disk cleanup operation can be performed on that partition.

- Click on Clean up system files. You will be prompted to give your consent with administrative privileges.

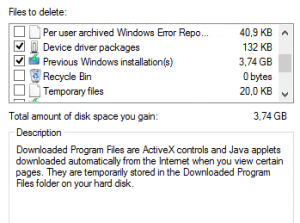
- Now the whole partition will be scanned for unnecessary files and results laid out across several categories.

- Select Previous Windows installation.
- Click on OK to initiate the clean up.
- Once the cleaning is over, restart the computer to make the changes effective.
Solution 2: Remove the Files of the Unused Windows Features
Windows features are components which greatly enhance the capabilities of Windows OS. Windows comes up loads of features, some of them are essential even for performing the most basic tasks while others are seldom or never used at all by the average user. Hence removing the unnecessary features from Windows can help gain some valuable space to the system. And these features can always be downloaded from the internet in the future should their need arise.
- Open the start menu.

- Search for Command Prompt. Right-click it from the search results and select Run as administrator.

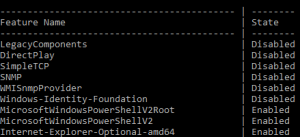
- Type the following command to bring up the list of available Windows features: DISM.exe /Online /English /Get-Features /Format:Table

- From the list which we just talked about, note down all the disabled Windows features and their names.

- Use the following command along with the name of the feature to remove it’s files permanently from the system: DISM.exe /Online /Disable-Feature /featurename:NAME /Remove
- Repeat step # 5 again until you’ve removed all unwanted features from the system.