It’s an open secret that Windows 10 and Google Chrome have some compatibility issues with each other.
These issues result in a not so pleasing experience for the user. Freezing tabs is one such irritating problem that is being witnessed since the last update of Windows 10. Probably you must have lost a lot of valuable browsing sessions due to the chrome tabs freezing issue. Here we are sharing the methods to fix chrome tabs freezing issue in windows 10.
To effectively stop Chrome from freezing you should clean Chrome junk, clean Chrome and System junk using the ST Cleaner software:
Clean Up Chrome Junk Using ST Cleaner Software
ST Cleaner is a stand alone, 100% legitimate software which follows security principles
Methods to Fix Chrome Tabs Freezing Issue in Windows 10
There are several methods that you can try to fix the freezing tabs issue in Windows 10. Follow these methods in the same order they are given. This will help you to save time by going for the easiest ones in the beginning and moving to the more technical ones later.
Disable Problematic Extensions
Extensions are basically add-ons that help to add extra capabilities to the browser. But sometimes they act over wrong due to either poor coding or compatibility issues. If you’ve discovered the chrome tabs to be freezing frequently, the first method you should try is to disable chrome extensions. To do this.
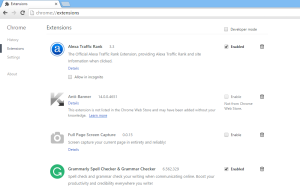
- Type “chrome://extensions” in the address bar of chrome and press Enter (Alternatively, you can also click the menu icon and choose Settings. And finally select Extensions tab on the left-hand side).

Extensions - Once you are on the extensions screen, uncheck the Enabled option in front of an extension to disable it.
- Disable all extensions and then check if the issue is solved. If the problem gets solved indeed, one of more extensions might be the root cause.
- Now enable them one by one. Once you’ve found the problematic extension, delete it by clicking on the Trash icon next to it in the Extensions window.
If this method didn’t help you out, proceed ahead.
Disable Conflicting Modules
Some of the chrome extensions or plugins installed may cause conflicts with the OS or chrome itself. Disabling conflicting modules may help solve this issue. To disable conflicting modules in chrome:
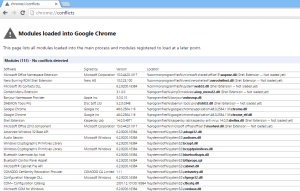
- Type “chrome://conflicts” in the Chrome search bar and press Enter.

Search for any Conflicting Modules - If any conflicts are detected, they will be laid out along with the problematic app which is causing the conflict.
- Uninstall the conflicting app from Control Panel. In case of an extension being the problem, remove it by following the method we just explained in the upper portion of this article.
- No conflicts detected means all is well as far as any conflicts causing this issue is concerned.
Reset Google Chrome
Changes made to Google Chrome may also cause problems within the browser. Resetting the browser to the default state may solve the freezing tabs issue. To reset Chrome, follow the simple steps given below.
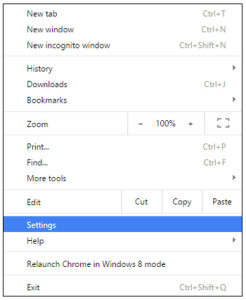
- Open Menu by clicking on the icon on the top right corner.
- Click on Settings. Scroll down to the bottom and Choose Show advanced settings.

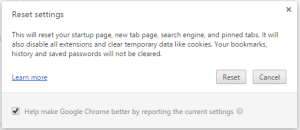
- Once again, scroll down to the bottom of the window and click on the Reset settings button. Select Reset from the confirmation popup window. It will restore Chrome to it’s default state and possibly resolve the problem.

Reset settings
Revert Chrome to the Previous Version
If any of the above-mentioned methods did not help solve the chrome freezing tabs issue in windows 10, it is the time to revert chrome to the previous version. You can do this by uninstalling the program from the control panel. Then download and install the previous version of the chrome from any trusted source like Softpedia.