At times, iTunes Library shows up artists more than once.
In this article, you’ll learn how to identify duplicate artists that clutter up your iTunes library. These are basically the “duplicate artists” that cannot be directly detected in an iPhone or iPod. Let’s take a closer look at how to take advantage of a third party duplicate cleaning tool to automate the task and remove duplicates instantly. Read on.
Clone Files Checker Download w/ Verisign Digital Certificate
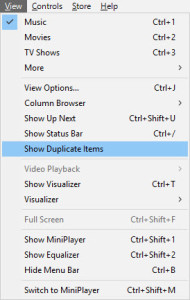
Using Show Duplicate Items Feature
By using this feature in iTunes you’ll be able to see all duplicate iTunes media files based on three criteria: Name, Artist and Album. Use the Artist column to rearrange all duplicate items. This will make it easy to find multiple occurrences of the same artist.
- Open iTunes. Click Start > All Apps > iTunes (folder) > iTunes (shortcut).
- Now iTunes will display only the duplicate media items. Click the Artist column head to sort its contents alphabetically.

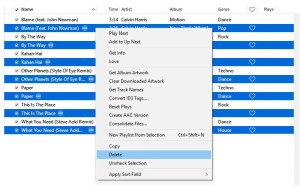
- Delete all duplicate artists. To do so, right-click a duplicate item and choose Delete. To delete all duplicate artists, press Ctrl + A to select all items at once; and then press Delete key to remove them.
Disable Copying Files to iTunes Media Folder
iTunes uses the media folder to organize your music files in a better way. It’s made up of all the music files that you’ve added to iTunes library — on the first time after program installation or through File menu. Many customers might have experienced that copying of music to iTunes media folder results into duplicate (or multiple) versions of the original files. Disable this feature using the Preferences dialog as follows:
- You will see the Advanced Preferences dialog on the screen. Click the Advanced tab on the far-right.
- You’ll now be seeing settings along with checkboxes before them. Uncheck the Copy files to iTunes Media folder when adding to library box.

- Click OK to save the changes.
Group Songs by their Artist Names
No matter how well you organize your iTunes library, you still get duplicate artists somehow. Get your act together by using the Group by feature in File Explorer. This allows you to sort long list of iTunes music files, chances are you get too many duplicate artists that you don’t even know.
- Click the File Explorer icon on your Taskbar.
- Open the following directory:
- C:\Users\USER_NAME\Music\iTunes\iTunes Media\Automatically Add to iTunes
- Click the Group by drop down box under Current View.
- You now have two choices:
- Select Album Artist to view the duplicate items by their album artists.
- Select Contributing Artists to view the duplicate items by their contributing artists.

Arranging Alphabetically
- It’ll take some time to rearrange all items in the window depending on the total number of files.
- Once the items have been rearranged, you’ll be able to see original and duplicate copies of the artist. Make a custom selection using Ctrl + Click and delete it using the Delete key.
Note: To reset the file grouping, click the Group by drop down box and then choose (None) option.
Automate the Task Using Clone Files Checker
Clone Files Checker is a handy solution that helps find duplicate artists from various categories of files. It searches duplicate artists imported from CDs/ DVDs, the music & movie content purchased from iTunes Store, media files synchronized through iPhone & iPod.
- Download Clone Files Checker from its company website.
- Install the program on your computer and launch it.
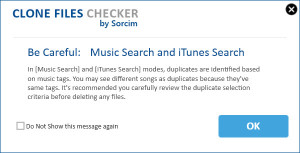
- A new warning pops up on your screen regarding the changes in music tags. Read it carefully and then click OK.
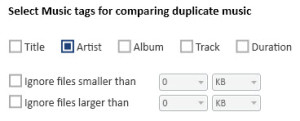
- The default music tags selection is Title, Album and File Content. You might want to uncheck them all, and check only the Artist box in order to find dupes arranged by Artists.
- Wait till Clone Files Checker processes and accumulates the results. The file filtering process might a while. Depending on your music collection.
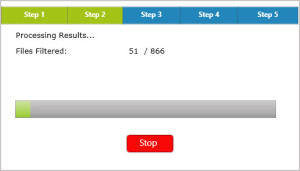
Duplicate Scan in Progress
- Once the results have been accumulated in the Results Box, click the Select Duplicates button. Also, choose a preferred option from the wide range of options you see in the following screenshot.
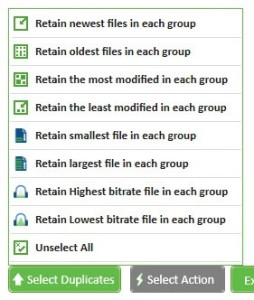
- Click the Artist column head to sort all duplicates by their Artists. Review the list carefully.
- Finally click the Select Action button and then choose an action (Permanent Delete or Move to Folder).
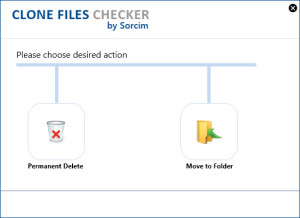
Select the appropriate option
Bonus Tip
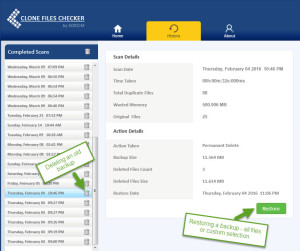
In today’s fast-paced world, file backup is often neglected. Clone Files Checker saves a copy of the deleted music in a compressed file format that reduces its size. The file backup feature is of utmost importance to guard against mistaken deletion of data.
To restore a deleted iTunes music file, click the History tab > Select a previous scan > Restore. You’ll be prompted to select all files or a custom selection. Select the files, click Restore and then specify a folder.
Also, you may delete old backups to save HD space. Simply click the trashcan icon next to the scan date-time to delete it.
