Duplicate files act as a bane and cause a headache to the user with the amount of space they occupy as well as contributing largely to the messy state of data.
This holds true for both cloud storage as well as local computer storage. Taking stock of this issue and rectifying it at the earliest is imperative for the user. Today we’ll look at 3 different methods to remove duplicates from a single Google Drive folder.
Cleanup Google Drive Duplicates from a Single Folder
Clone Files Checker follows Google Software Principles
Using Google Drive
Google Drive’s web interface can be used intelligently to weed out duplicates easily. However, this is more of a manual solution as the user will be required to do it all themselves. Also, this process lacks the depth of scrutinizing the content and basically hovers around looking for duplicates by focusing solely on file names.
- Visit the Google Drive homepage located at https://drive.google.com/drive/my-drive
- Click the My Drive link on the left so that it collapses and brings up a list of all the folders it contains.
- Now expand the respective folder until you’ve located the target file which contains duplicates.
- Once all the files have been listed, click the Name column head to arrange all the items alphabetically.

- Now you can easily spot all the duplicates and proceed to delete them without any issues.
For those users who have downloaded Google Drive on their computers, they can also remove duplicates in a similar fashion by launching the Google Drive application on their computer, navigating to the suspect folder and arranging its contents alphabetically. And from then onwards, deleting duplicates should be as easy as it should be.
Using a Duplicate Finder
A purpose built duplicate cleaning software guarantees accurate results at the stroke of a few clicks. This helps save time as well as providing you with the ability to customize your scan if the need arises. Clone Files Checker is all what you need to do the needful. Running a scan on your computer will unfold a powerful algorithm that will minutely look at not just file names but it will pay due attention to the content as well. This means that any rogue files that are absolutely identical but they have been somehow renamed separately won’t be able to escape the scan and a flag will be raised at once.
- Download Clone Files Checker on your computer and then install it.
- Launch the software through its desktop shortcut.
- Click the Cloud Scan tab and then select Load Drive from the left pane.
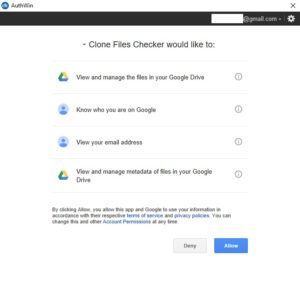
- Enter your Google account credentials and then give your approval when you’re prompted for granting access to your Google Drive content.

- Once the content has been loaded completely select any / all folders you wish to include in the scan and then select All Files / Custom → File Type (as applicable) from Step 2.
- Finally click Start Search to kickstart the scan.
- Once the scan results are out, you can (optionally) select by clicking the Select Duplicates button whether you want to retain the oldest, newest, least modified or most modified file from each group of duplicates.
- Lastly, hit the Select Action button to choose whether to delete the duplicate files permanently or to move them to a separate folder. If you choose the former, you will be prompted to create a backup before proceeding to deletion, in case you need those files in the future.
